
티스토리 뷰
이번에는 서버요청에 권한을 함께 보내 보안을 강화해보려 한다.
일반적인 사용자라면 앱이나 웹을 통해 정상적인 루트로 서버에 API요청을 보내겠지만 그게아닌 PostMan등의 개발 API플랫폼을 통해 서버데이터에 접근 하여 데이터를 조작할 수 있다.
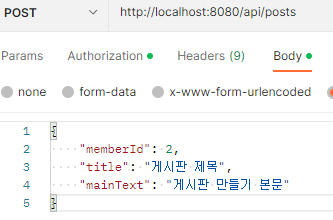
예를 들어 아래와 같은 게시글 작성API POST요청에 memberId만 바꾸어 보내면 다른 사람이 쓴 글이 되어 버려 치명적인 문제가 될 수 있다.
이를 보안하기 위해 기존 프로젝트에 Spring Security를 적용해 사용자에게 권한을 주어 인가된 사용자만 데이터에 접근 할 수 있게 바꿔보자.
필자와 같이 Spring을 독학하고 Inflearn 김영한님의 스프링완전정복으로 공부한 사람들은 Security가 낯설게 느껴질 것이다. 강의에서는 웹에서 Security없이 Session과 Cookie를 사용해 PRG를 구현했지만 앱은 쿠키를 사용하지 않는다. Security없이 할 수 있는 방법이 없나 계속 찾아봤더니 쉽지않다. 이 쉽지않은 기술을 그마나 쉽게 사용하라고 나온게 Security이니 당장 써보자.
당장 써보자라고 했지만 Security를 적용하려고 며칠을 구글링 하며 엄청난 삽질을 했다. Security를 처음 써보는 나로써는 개인 블로그에 올라온 것을 그대로 따라해봐도 오류가 계속나고 만약 되더라도 내 프로젝트에 적용을 하니 오류가 나버리는 일이 계속되었다.
그래서! Security의 기본적인 동작구조를 공부하고 될 때까지 시도한 결과 성공했다. 이 맛에 코딩한다.
시큐리티는 필터체인을 통해 정해진 필터를 통과하며 인증/인가 가 이루어진다.

필터체인에 관한 자세한 내용은 여기를 참조하자: Spring Security, 제대로 이해하기 - FilterChain
gradle에 추가하자
implementation 'org.springframework.boot:spring-boot-starter-security'
Member클래스에 추가
private String roles; //USER, ADMIN권한을 ROLE_USER와 ROLE_ADMIN으로 나눠놓는다.
SecurityConfig 기본설정 (스프링 3.0.x 버전의 설정방법)
@Configuration
@EnableWebSecurity
@RequiredArgsConstructor
public class SecurityConfig {

    private final CorsConfig corsConfig;
    private final MemberRepository userRepository;
    @Bean
    public SecurityFilterChain filterChain(HttpSecurity http) throws Exception {
        //http.addFilterBefore(new MyFilter1(), SecurityContextPersistenceFilter.class);
        http.csrf().disable();
        http.sessionManagement().sessionCreationPolicy(SessionCreationPolicy.STATELESS)//세션사용안함
                .and()
                .formLogin().disable()
                .httpBasic().disable()
                .apply(new MyCustomDsl());
        http.authorizeRequests()
        		//  /api/~ 로 들어오는 요청들은 권한이 있어야함
                .requestMatchers("/api/**").access("hasRole('ROLE_ADMIN') or hasRole('ROLE_MANAGER') or hasRole('ROLE_USER')")
                .requestMatchers("/admin/**").access("hasRole('ROLE_ADMIN')")
                //  그외의 요청들은 모두 허용
                .anyRequest().permitAll();

        return http.build();
    }

    public class MyCustomDsl extends AbstractHttpConfigurer<MyCustomDsl, HttpSecurity> {
        @Override
        public void configure(HttpSecurity http) throws Exception {
            AuthenticationManager authenticationManager = http.getSharedObject(AuthenticationManager.class);
            http
                    .addFilter(corsConfig.corsFilter())
                    //.addFilter(new JwtAuthenticationFilter(authenticationManager)) 아직안씀
                    //.addFilter(new JwtAuthorizationFilter(authenticationManager, userRepository)); 아직안씀
        }
    }
}
CorsConfig
@Configuration
public class CorsConfig {

    @Bean
    public CorsFilter corsFilter(){
        UrlBasedCorsConfigurationSource source = new UrlBasedCorsConfigurationSource();
        CorsConfiguration config = new CorsConfiguration();
        config.setAllowCredentials(true);//내 서버가 응답을 할때 json을 자바스크립트에서 처리 할 수 있게 할지를 설정하는 것
        config.addAllowedOrigin("*"); // 모든 아이피에 응답을 허용하겠다.
        config.addAllowedMethod("*"); // 모든 헤더에 응답을 허용하겠다.
        config.addAllowedHeader("*");// 모든 post,get,put,patch,delete 요청을 허용하겠다.
        source.registerCorsConfiguration("/api/**", config);
        return new CorsFilter(source);
    }
}
(Cross-Origin Resource Sharing,CORS) 란 다른 출처의 자원을 공유할 수 있도록 설정하는 권한 체제를 말한다.
따라서 CORS를 설정해주지 않거나 제대로 설정하지 않은 경우, 원하는대로 리소스를 공유하지 못하게 됨
이렇게까지 하고 localhost:8080/api/ 아무데나 접근해보면 접근 거부가 뜰 것이다.
회원가입
회원가입도 변경해야한다. 이전에 다루었던 jbcrypt 라이브러리를 지우고 Security의 bcrypt를 사용해 암호화 하고 권한을 붙여주고 Controller도 주소를 /api/register 가 아닌 /register 로 바꾸어 권한이 없어도 회원가입을 할 수 있게 변경하자.
Member member = new Member(userName, bCryptPasswordEncoder.encode(password1),"ROLE_USER");
기본적인 설정은 완료했다. 그 뒤에는 로그인과 JWT토큰 생성, 생성된 토큰을 헤더에 달아 인증까지 해보자.
'Spring > 게시판API서버' 카테고리의 다른 글
| [Spring] 게시판 API (7) 파일(이미지) 업로드 (0) | 2023.03.17 |
|---|---|
| [Spring] 게시판 API (6-2) JWT 적용 (0) | 2023.03.13 |
| [Spring] 게시판 API (5) 비밀번호 암호화 (1) | 2023.03.08 |
| [Spring] 게시판 API (4) 생성일, 수정일 추가 (0) | 2023.03.07 |
| [Spring] 게시판 API (3) Controller (0) | 2023.03.07 |
- Total
- Today
- Yesterday
- Spring 채팅
- bcrypt
- MessageBroker
- Spring Stomp
- spring orphan
- ERD설계
- Bcypt
- Stomp RabbitMQ
- loadbalancing
- Cache
- ChattingApp
- FCM
- Kubernetes
- Spring RabbitMQ
- 게시판 채팅
- Stomp Kafka
- 푸시알림동작원리
- Spring 대댓글
- Spring
- Spring WebSocket
- 웹소켓 채팅
- Vmmem
- nativeQuery
- Authentication
- authorization
- Flutter
- 로컬캐시
- springboot
- Vmmem종료
- Security
| 일 | 월 | 화 | 수 | 목 | 금 | 토 |
|---|---|---|---|---|---|---|
| 1 | 2 | 3 | 4 | 5 | ||
| 6 | 7 | 8 | 9 | 10 | 11 | 12 |
| 13 | 14 | 15 | 16 | 17 | 18 | 19 |
| 20 | 21 | 22 | 23 | 24 | 25 | 26 |
| 27 | 28 | 29 | 30 |